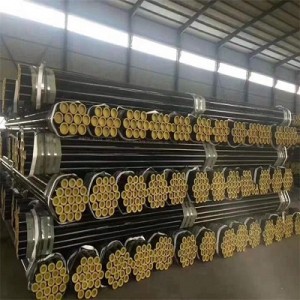
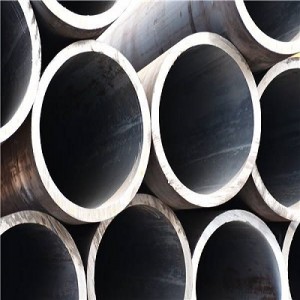
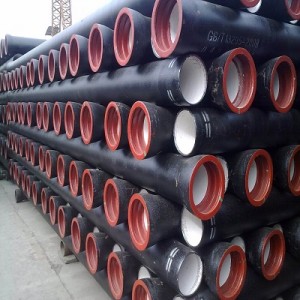
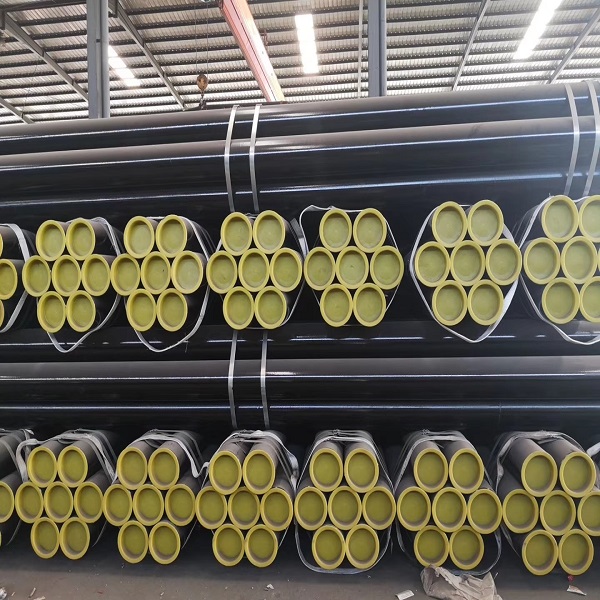
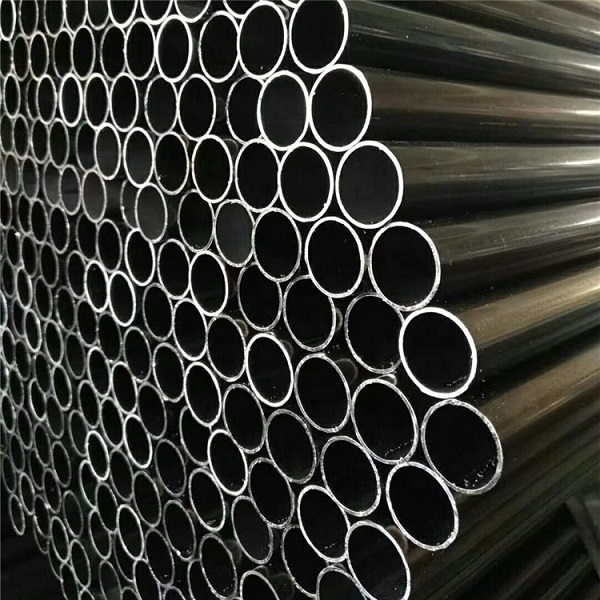
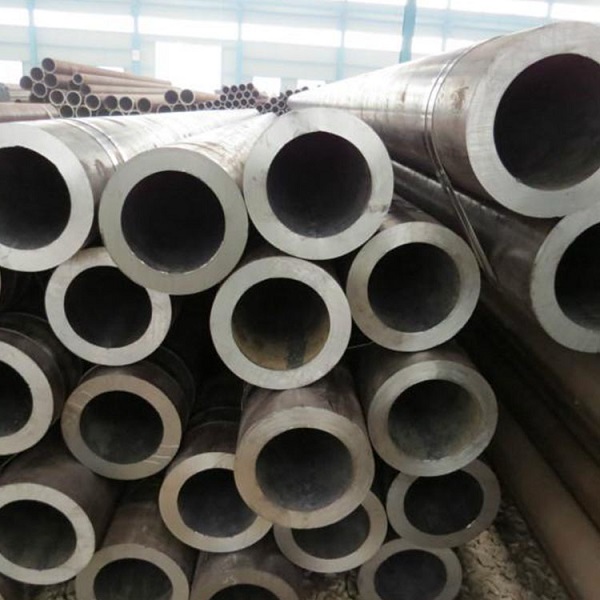
Carbon Steel Pipe and alloy steel pipe
Our company is engaged in the export business of carbon steel and alloy steel. Alloy Pipe, alloy steel pipe, Alloy Steel Pipe China, carbon pipe, Carbon Steel Pipe, Carbon Steel Pipe China.
Do you know the difference between carbon steel and alloy steel?
Carbon steel: mainly refers to the mechanical properties depend on the carbon content of steel, and generally do not add a lot of alloying elements of steel, sometimes called plain carbon steel or carbon steel. Carbon steel, also known as carbon steel, carbon content WC less than 2% iron carbon alloy.
Carbon steel in addition generally contains a small amount of silicon, manganese, sulfur, phosphorus can be divided according to the use of carbon steel carbon structural steel, carbon tool steel and free-cutting structural steel three carbon structural steel is divided into structural steel and machine structural steel, which can be divided into low carbon steel (WC ≤ 0.25%), medium carbon steel (WC 0.25% – 0.6% ) and high carbon steels (WC> 0.6%).
According to phosphorus and sulfur content, carbon steels can be divided into ordinary carbon steels (phosphorus and sulfur are higher), high quality carbon steels (phosphorus and sulfur are lower) high-quality steel (phosphorus, sulfur lower).
Alloy steel: based on carbon steel, one or more alloying elements are deliberately added to improve the serviceability and process performance of the iron-based alloy is called alloy steel. Alloy steel refers to the steel containing silicon and manganese as alloying elements or deoxidizing elements, other alloying elements such as chromium, nickel, molybdenum, vanadium, titanium, copper, tungsten, aluminum, cobalt, niobium, zirconium and other elements, and some also contain some non-metal elements (such as boron, nitrogen, etc.) steel.
According to the amount of alloying elements in steel, but also can be divided into low alloy steel, medium alloy and high alloy steel.
Chemical composition difference:
(1) Carbon steel: Low carbon steel (C≤0.25%); Medium carbon steel (C≤0.25 ~ 0.60%); High carbon steel (C≤0.60%).
(2) Alloy steel: Low alloy steel (total content of alloying elements ≤ 5%); Medium alloy steel (total content of alloying elements> 5 ~ 10%) ; High alloy steel (total content of alloying elements> 10%.
Carbon steel advantages:
Carbon steel has high strength, ductility and toughness, low cost, used in heavy machinery for the manufacture of heavy load parts. Can be obtained by heat treatment better mechanical properties cast.
Alloy steel advantages:
In addition to iron in steel elements containing only carbon steel, carbon steel, other silicon, sulfur, phosphorus and other impurities. In addition to other elements of chromium, manganese, molybdenum, titanium, tungsten, vanadium, niobium, boron, silicon and nickel alloy steel to achieve the desired properties such as high temperature, high elasticity, abrasion resistance, high strength, high toughness and so on. Alloy steel hardness wear resistance, hardenability, corrosion resistance than carbon steel excellent.
Here you can see some of the commonly use Carbon steel material grades in Process piping.
·For Pipes: ASTM A53 Gr A/B, A106 Gr A/B/C, API 5L Gr B
·ASTM A53 Pipe, Steel, Black and Hot-Dipped, Zinc-Coated, Welded, and Seamless
·ASTM A106 Seamless Carbon Steel Pipe for High-Temperature Service
Overview
Application
It Is Mainly Used for mechanical and used to make gas cylinders.include carbon and alloy steel seamless mechanical tubing,and covers both seamless hot-finished mechanical tubing and seamless cold-finished mechanical tubing in sizes up to and including 12 3⁄4 in. (323.8 mm) outside diameter for round tubes with wall thicknesses as required.
Main Grade
1018,1026,8620,4130,4140
Chemical Component
TABLE 1 Chemical Requirements of Low-Carbon Steels
| Grade | Chemical Composition Limits, % | |||||||
| Designation | CarbonA | ManganeseB | Phosphorus,B | Sulfur,B | ||||
| max | max | |||||||
| MT X 1015 | 0.10–0.20 | 0.60–0.90 | 0.04 | 0.05 | ||||
| MT 1010 | 0.05–0.15 | 0.30–0.60 | 0.04 | 0.05 | ||||
| MT 1015 | 0.10–0.20 | 0.30–0.60 | 0.04 | 0.05 | ||||
| MT 1020 | 0.15–0.25 | 0.30–0.60 | 0.04 | 0.05 | ||||
| MT X 1020 | 0.15–0.25 | 0.70–1.00 | 0.04 | 0.05 | ||||
B Limits apply to heat analysis; except as required by 6.1, product analyses are subject to the applicable additional tolerances given in Table 5.
TABLE 2 Chemical Requirements of Other Carbon Steels
|
Grade |
Chemical Composition Limits, %A |
||||
|
Designation |
|||||
|
Carbon |
Manganese |
Phosphorus, |
Sulfur, |
||
|
max |
max |
||||
|
1008 |
0.10 max |
0.30–0.50 |
0.040 |
0.050 |
|
|
1010 |
0.08–0.13 |
0.30–0.60 |
0.040 |
0.050 |
|
|
1012 |
0.10–0.15 |
0.30–0.60 |
0.040 |
0.050 |
|
|
1015 |
0.13–0.18 |
0.30–0.60 |
0.040 |
0.050 |
|
|
1016 |
0.13–0.18 |
0.60–0.90 |
0.040 |
0.050 |
|
|
1017 |
0.15–0.20 |
0.30–0.60 |
0.040 |
0.050 |
|
|
1018 |
0.15–0.20 |
0.60–0.90 |
0.040 |
0.050 |
|
|
1019 |
0.15–0.20 |
0.70–1.00 |
0.040 |
0.050 |
|
|
1020 |
0.18–0.23 |
0.30–0.60 |
0.040 |
0.050 |
|
|
1021 |
0.18–0.23 |
0.60–0.90 |
0.040 |
0.050 |
|
|
1022 |
0.18–0.23 |
0.70–1.00 |
0.040 |
0.050 |
|
|
1025 |
0.22–0.28 |
0.30–0.60 |
0.040 |
0.050 |
|
|
1026 |
0.22–0.28 |
0.60–0.90 |
0.040 |
0.050 |
|
|
1030 |
0.28–0.34 |
0.60–0.90 |
0.040 |
0.050 |
|
|
1035 |
0.32–0.38 |
0.60–0.90 |
0.040 |
0.050 |
|
|
1040 |
0.37–0.44 |
0.60–0.90 |
0.040 |
0.050 |
|
|
1045 |
0.43–0.50 |
0.60–0.90 |
0.040 |
0.050 |
|
|
1050 |
0.48–0.55 |
0.60–0.90 |
0.040 |
0.050 |
|
|
1518 |
0.15–0.21 |
1.10–1.40 |
0.040 |
0.050 |
|
|
1524 |
0.19–0.25 |
1.35–1.65 |
0.040 |
0.050 |
|
|
1541 |
0.36–0.44 |
1.35–1.65 |
0.040 |
0.050 |
|
A The ranges and limits given in this table apply to heat analysis; except as required by 6.1, product analyses are subject to the applicable additional toler-ances given in Table Number 5.
|
TABLE 3 Chemical Requirements for Alloy Steels |
|||||||||
|
NOTE |
1—The ranges and limits in this table apply to steel not exceeding 200 in.2 (1290 cm2) in cross-sectional area. |
||||||||
|
NOTE |
2—Small quantities of certain elements are present in alloy steels which are not specified or required. These elements are considered as incidental |
||||||||
|
and may be present to the following maximum amounts: copper, 0.35 %; nickel, 0.25 %; chromium, 0.20 %; molybdenum, 0.10 %. |
|||||||||
|
NOTE |
3—The ranges and limits given in this table apply to heat analysis; except as required by 6.1, product analyses are subject to the applicable |
||||||||
|
additional tolerances given in Table Number 5. |
|||||||||
| GradeA,B | Chemical Composition Limits, % | |||||||
| Designa- | ||||||||
| Carbon | Manganese | Phospho- | Sulfur,C,D | Silicon | Nickel | Chromium | Molybde- | |
| tion | ||||||||
| rus,Cmax | max | num | ||||||
| 1330 | 0.28–0.33 | 1.60–1.90 | 0.04 | 0.04 | 0.15–0.35 | … | … | … |
| 1335 | 0.33–0.38 | 1.60–1.90 | 0.04 | 0.04 | 0.15–0.35 | … | … | … |
| 1340 | 0.38–0.43 | 1.60–1.90 | 0.04 | 0.04 | 0.15–0.35 | … | … | … |
| 1345 | 0.43–0.48 | 1.60–1.90 | 0.04 | 0.04 | 0.15–0.35 | … | … | … |
| 3140 | 0.38–0.43 | 0.70–0.90 | 0.04 | 0.04 | 0.15–0.35 | 1.10–1.40 | 0.55–0.75 | … |
| E3310 | 0.08–0.13 | 0.45–0.60 | 0.025 | 0.025 | 0.15–0.35 | 3.25–3.75 | 1.40–1.75 | … |
| 4012 | 0.09–0.14 | 0.75–1.00 | 0.04 | 0.04 | 0.15–0.35 | … | … | 0.15–0.25 |
| 4023 | 0.20–0.25 | 0.70–0.90 | 0.04 | 0.04 | 0.15–0.35 | … | … | 0.20–0.30 |
| 4024 | 0.20–0.25 | 0.70–0.90 | 0.04 | 0.035−0.050 | 0.15–0.35 | … | … | 0.20–0.30 |
| 4027 | 0.25–0.30 | 0.70–0.90 | 0.04 | 0.04 | 0.15–0.35 | … | … | 0.20–0.30 |
| 4028 | 0.25–0.30 | 0.70–0.90 | 0.04 | 0.035−0.050 | 0.15–0.35 | … | … | 0.20–0.30 |
| 4037 | 0.35–0.40 | 0.70–0.90 | 0.04 | 0.04 | 0.15–0.35 | … | … | 0.20–0.30 |
| 4042 | 0.40–0.45 | 0.70–0.90 | 0.04 | 0.04 | 0.15–0.35 | … | … | 0.20–0.30 |
| 4047 | 0.45–0.50 | 0.70–0.90 | 0.04 | 0.04 | 0.15–0.35 | … | … | 0.20–0.30 |
| 4063 | 0.60–0.67 | 0.75–1.00 | 0.04 | 0.04 | 0.15–0.35 | … | … | 0.20–0.30 |
| 4118 | 0.18–0.23 | 0.70–0.90 | 0.04 | 0.04 | 0.15–0.35 | … | 0.40–0.60 | 0.08–0.15 |
| 4130 | 0.28–0.33 | 0.40–0.60 | 0.04 | 0.04 | 0.15–0.35 | … | 0.80–1.10 | 0.15–0.25 |
| 4135 | 0.32–0.39 | 0.65–0.95 | 0.04 | 0.04 | 0.15–0.35 | … | 0.80–1.10 | 0.15–0.25 |
| 4137 | 0.35–0.40 | 0.70–0.90 | 0.04 | 0.04 | 0.15–0.35 | … | 0.80–1.10 | 0.15–0.25 |
| 4140 | 0.38–0.43 | 0.75–1.00 | 0.04 | 0.04 | 0.15–0.35 | … | 0.80–1.10 | 0.15–0.25 |
| 4142 | 0.40–0.45 | 0.75–1.00 | 0.04 | 0.04 | 0.15–0.35 | … | 0.80–1.10 | 0.15–0.25 |
| 4145 | 0.43–0.48 | 0.75–1.00 | 0.04 | 0.04 | 0.15–0.35 | … | 0.80–1.10 | 0.15–0.25 |
| 4147 | 0.45–0.50 | 0.75–1.00 | 0.04 | 0.04 | 0.15–0.35 | … | 0.80–1.10 | 0.15–0.25 |
| 4150 | 0.48–0.53 | 0.75–1.00 | 0.04 | 0.04 | 0.15–0.35 | … | 0.80–1.10 | 0.15–0.25 |
| 4320 | 0.17–0.22 | 0.45–0.65 | 0.04 | 0.04 | 0.15–0.35 | 1.65–2.00 | 0.40–0.60 | 0.20–0.30 |
| 4337 | 0.35–0.40 | 0.60–0.80 | 0.04 | 0.04 | 0.15–0.35 | 1.65–2.00 | 0.70–0.90 | 0.20–0.30 |
| E4337 | 0.35–0.40 | 0.65–0.85 | 0.025 | 0.025 | 0.15–0.35 | 1.65–2.00 | 0.70–0.90 | 0.20–0.30 |
| 4340 | 0.38–0.43 | 0.60–0.80 | 0.04 | 0.04 | 0.15–0.35 | 1.65–2.00 | 0.70–0.90 | 0.20–0.30 |
| E4340 | 0.38–0.43 | 0.65–0.85 | 0.025 | 0.025 | 0.15–0.35 | 1.65–2.00 | 0.70–0.90 | 0.20–0.30 |
| 4422 | 0.20–0.25 | 0.70–0.90 | 0.04 | 0.04 | 0.15–0.35 | … | … | 0.35–0.45 |
| 4427 | 0.24–0.29 | 0.70–0.90 | 0.04 | 0.04 | 0.15–0.35 | … | … | 0.35–0.45 |
| 4520 | 0.18–0.23 | 0.45–0.65 | 0.04 | 0.04 | 0.15–0.35 | … | … | 0.45–0.60 |
| 4615 | 0.13–0.18 | 0.45–0.65 | 0.04 | 0.04 | 0.15–0.35 | 1.65–2.00 | … | 0.20–0.30 |
| 4617 | 0.15–0.20 | 0.45–0.65 | 0.04 | 0.04 | 0.15–0.35 | 1.65–2.00 | … | 0.20–0.30 |
| 4620 | 0.17–0.22 | 0.45–0.65 | 0.04 | 0.04 | 0.15–0.35 | 1.65–2.00 | … | 0.20–0.30 |
| 4621 | 0.18–0.23 | 0.70–0.90 | 0.04 | 0.04 | 0.15–0.35 | 1.65–2.00 | … | 0.20–0.30 |
| 4718 | 0.16–0.21 | 0.70–0.90 | 0.04 | 0.04 | 0.15–0.35 | 0.90–1.20 | 0.35–0.55 | 0.30–0.40 |
| 4720 | 0.17–0.22 | 0.50–0.70 | 0.04 | 0.04 | 0.15–0.35 | 0.90–1.20 | 0.35–0.55 | 0.15–0.25 |
| 4815 | 0.13–0.18 | 0.40–0.60 | 0.04 | 0.04 | 0.15–0.35 | 3.25–3.75 | … | 0.20–0.30 |
| 4817 | 0.15–0.20 | 0.40–0.60 | 0.04 | 0.04 | 0.15–0.35 | 3.25–3.75 | … | 0.20–0.30 |
| 4820 | 0.18–0.23 | 0.50–0.70 | 0.04 | 0.04 | 0.15–0.35 | 3.25–3.75 | … | 0.20–0.30 |
| 5015 | 0.12–0.17 | 0.30–0.50 | 0.04 | 0.04 | 0.15–0.35 | … | 0.30–0.50 | … |
| 5046 | 0.43–0.50 | 0.75–1.00 | 0.04 | 0.04 | 0.15–0.35 | … | 0.20–0.35 | … |
| 5115 | 0.13–0.18 | 0.70–0.90 | 0.04 | 0.04 | 0.15–0.35 | … | 0.70–0.90 | … |
| 5120 | 0.17–0.22 | 0.70–0.90 | 0.04 | 0.04 | 0.15–0.35 | … | 0.70–0.90 | … |
| 5130 | 0.28–0.33 | 0.70–0.90 | 0.04 | 0.04 | 0.15–0.35 | … | 0.80–1.10 | … |
| 5132 | 0.30–0.35 | 0.60–0.80 | 0.04 | 0.04 | 0.15–0.35 | … | 0.75–1.00 | … |
| 5135 | 0.33–0.38 | 0.60–0.80 | 0.04 | 0.04 | 0.15–0.35 | … | 0.80–1.05 | … |
| 5140 | 0.38–0.43 | 0.70–0.90 | 0.04 | 0.04 | 0.15–0.35 | … | 0.70–0.90 | … |
| 5145 | 0.43–0.48 | 0.70–0.90 | 0.04 | 0.04 | 0.15–0.35 | … | 0.70–0.90 | … |
| 5147 | 0.46–0.51 | 0.70–0.95 | 0.04 | 0.04 | 0.15–0.35 | … | 0.85–1.15 | … |
| 5150 | 0.48–0.53 | 0.70–0.90 | 0.04 | 0.04 | 0.15–0.35 | … | 0.70–0.90 | … |
| 5155 | 0.51–0.59 | 0.70–0.90 | 0.04 | 0.04 | 0.15–0.35 | … | 0.70–0.90 | … |
| 5160 | 0.56–0.64 | 0.75–1.00 | 0.04 | 0.04 | 0.15–0.35 | … | 0.70–0.90 | … |
| 52100E | 0.93–1.05 | 0.25–0.45 | 0.025 | 0.015 | 0.15–0.35 | 0.25 max | 1.35–1.60 | 0.10 max |
| E50100 | 0.98–1.10 | 0.25–0.45 | 0.025 | 0.025 | 0.15–0.35 | … | 0.40–0.60 | … |
| E51100 | 0.98–1.10 | 0.25–0.45 | 0.025 | 0.025 | 0.15–0.35 | … | 0.90–1.15 | … |
| E52100 | 0.98–1.10 | 0.25–0.45 | 0.025 | 0.025 | 0.15–0.35 | … | 1.30–1.60 | … |
| Vanadium | ||||||||
| 6118 | 0.16–0.21 | 0.50–0.70 | 0.04 | 0.04 | 0.15–0.35 | … | 0.50–0.70 | 0.10–0.15 |
| 6120 | 0.17–0.22 | 0.70–0.90 | 0.04 | 0.04 | 0.15–0.35 | … | 0.70–0.90 | 0.10 min |
| 6150 | 0.48–0.53 | 0.70–0.90 | 0.04 | 0.04 | 0.15–0.35 | … | 0.80–1.10 | 0.15 min |
| Aluminum | Molybdenum | |||||||
| E7140 | 0.38–0.43 | 0.50–0.70 | 0.025 | 0.025 | 0.15–0.40 | 0.95–1.30 | 1.40–1.80 | 0.30–0.40 |
| Nickel | ||||||||
| 8115 | 0.13–0.18 | 0.70–0.90 | 0.04 | 0.04 | 0.15–0.35 | 0.20–0.40 | 0.30–0.50 | 0.08–0.15 |
| 8615 | 0.13–0.18 | 0.70–0.90 | 0.04 | 0.04 | 0.15–0.35 | 0.40–0.70 | 0.40–0.60 | 0.15–0.25 |
| 8617 | 0.15–0.20 | 0.70–0.90 | 0.04 | 0.04 | 0.15–0.35 | 0.40–0.70 | 0.40–0.60 | 0.15–0.25 |
| 8620 | 0.18–0.23 | 0.70–0.90 | 0.04 | 0.04 | 0.15–0.35 | 0.40–0.70 | 0.40–0.60 | 0.15–0.25 |
| 8622 | 0.20–0.25 | 0.70–0.90 | 0.04 | 0.04 | 0.15–0.35 | 0.40–0.70 | 0.40–0.60 | 0.15–0.25 |
| 8625 | 0.23–0.28 | 0.70–0.90 | 0.04 | 0.04 | 0.15–0.35 | 0.40–0.70 | 0.40–0.60 | 0.15–0.25 |
| 8627 | 0.25–0.30 | 0.70–0.90 | 0.04 | 0.04 | 0.15–0.35 | 0.40–0.70 | 0.40–0.60 | 0.15–0.25 |
| 8630 | 0.28–0.33 | 0.70–0.90 | 0.04 | 0.04 | 0.15–0.35 | 0.40–0.70 | 0.40–0.60 | 0.15–0.25 |
| 8637 | 0.35–0.40 | 0.75–1.00 | 0.04 | 0.04 | 0.15–0.35 | 0.40–0.70 | 0.40–0.60 | 0.15–0.25 |
| 8640 | 0.38–0.43 | 0.75–1.00 | 0.04 | 0.04 | 0.15–0.35 | 0.40–0.70 | 0.40–0.60 | 0.15–0.25 |
| 8642 | 0.40–0.45 | 0.75–1.00 | 0.04 | 0.04 | 0.15–0.35 | 0.40–0.70 | 0.40–0.60 | 0.15–0.25 |
| 8645 | 0.43–0.48 | 0.75–1.00 | 0.04 | 0.04 | 0.15–0.35 | 0.40–0.70 | 0.40–0.60 | 0.15–0.25 |
| 8650 | 0.48–0.53 | 0.75–1.00 | 0.04 | 0.04 | 0.15–0.35 | 0.40–0.70 | 0.40–0.60 | 0.15–0.25 |
| 8655 | 0.51–0.59 | 0.75–1.00 | 0.04 | 0.04 | 0.15–0.35 | 0.40–0.70 | 0.40–0.60 | 0.15–0.25 |
| 8660 | 0.55–0.65 | 0.75–1.00 | 0.04 | 0.04 | 0.15–0.35 | 0.40–0.70 | 0.40–0.60 | 0.15–0.25 |
| 8720 | 0.18–0.23 | 0.70–0.90 | 0.04 | 0.04 | 0.15–0.35 | 0.40–0.70 | 0.40–0.60 | 0.20–0.30 |
| 8735 | 0.33–0.38 | 0.75–1.00 | 0.04 | 0.04 | 0.15–0.35 | 0.40–0.70 | 0.40–0.60 | 0.20–0.30 |
| 8740 | 0.38–0.43 | 0.75–1.00 | 0.04 | 0.04 | 0.15–0.35 | 0.40–0.70 | 0.40–0.60 | 0.20–0.30 |
| 8742 | 0.40–0.45 | 0.75–1.00 | 0.04 | 0.04 | 0.15–0.35 | 0.40–0.70 | 0.40–0.60 | 0.20–0.30 |
| 8822 | 0.20–0.25 | 0.75–1.00 | 0.04 | 0.04 | 0.15–0.35 | 0.40–0.70 | 0.40–0.60 | 0.30–0.40 |
| 9255 | 0.51–0.59 | 0.60–0.80 | 0.04 | 0.04 | 1.80–2.20 | … | 0.60–0.80 | … |
| 9260 | 0.56–0.64 | 0.75–1.00 | 0.04 | 0.04 | 1.80–2.20 | … | … | … |
| 9262 | 0.55–0.65 | 0.75–1.00 | 0.04 | 0.04 | 1.80–2.20 | … | 0.25–0.40 | … |
| E9310 | 0.08–0.13 | 0.45–0.65 | 0.025 | 0.025 | 0.15–0.35 | 3.00–3.50 | 1.00–1.40 | 0.08–0.15 |
| 9840 | 0.38–0.42 | 0.70–0.90 | 0.04 | 0.04 | 0.15–0.35 | 0.85–1.15 | 0.70–0.90 | 0.20–0.30 |
| 9850 | 0.48–0.53 | 0.70–0.90 | 0.04 | 0.04 | 0.15–0.35 | 0.85–1.15 | 0.70–0.90 | 0.20–0.30 |
| 50B40 | 0.38–0.42 | 0.75–1.00 | 0.04 | 0.04 | 0.15–0.35 | … | 0.40–0.60 | … |
| 50B44 | 0.43–0.48 | 0.75–1.00 | 0.04 | 0.04 | 0.15–0.35 | … | 0.40–0.60 | … |
| 50B46 | 0.43–0.50 | 0.75–1.00 | 0.04 | 0.04 | 0.15–0.35 | … | 0.20–0.35 | … |
| 50B50 | 0.48–0.53 | 0.74–1.00 | 0.04 | 0.04 | 0.15–0.35 | … | 0.40–0.60 | … |
| 50B60 | 0.55–0.65 | 0.75–1.00 | 0.04 | 0.04 | 0.15–0.35 | … | 0.40–0.60 | … |
| 51B60 | 0.56–0.64 | 0.75–1.00 | 0.04 | 0.04 | 0.15–0.35 | … | 0.70–0.90 | … |
| 81B45 | 0.43–0.48 | 0.75–1.00 | 0.04 | 0.04 | 0.15–0.35 | 0.20–0.40 | 0.35–0.55 | 0.08–0.15 |
| 86B45 | 0.43–0.48 | 0.75–1.00 | 0.04 | 0.04 | 0.15–0.35 | 0.40–0.70 | 0.40–0.60 | 0.15–0.25 |
| 94B15 | 0.13–0.18 | 0.75–1.00 | 0.04 | 0.04 | 0.15–0.35 | 0.30–0.60 | 0.30–0.50 | 0.08–0.15 |
| 94B17 | 0.15–0.20 | 0.75–1.00 | 0.04 | 0.04 | 0.15–0.35 | 0.30–0.60 | 0.30–0.50 | 0.08–0.15 |
| 94B30 | 0.28–0.33 | 0.75–1.00 | 0.04 | 0.04 | 0.15–0.35 | 0.30–0.60 | 0.30–0.50 | 0.08–0.15 |
| 94B40 | 0.38–0.43 | 0.75–1.00 | 0.04 | 0.04 | 0.15–0.35 | 0.30–0.60 | 0.30–0.50 | 0.08–0.15 |
B Grades shown in this table with the letter B, such as 50B40, can be expected to have 0.0005 % minimum boron control. A Grades shown in this table with prefix letter E generally are manufactured by the basic-electric-furnace process. All others are normally manufactured by the basic-open-hearth process but may be manufactured by the basic-electric-furnace process with adjustments in phosphorus and sulfur.
C The phosphorus sulfur limitations for each process are as follows:
Basic electric furnace 0.025 max % Acid electric furnace 0.050 max %
Basic open hearth 0.040 max % Acid open hearth 0.050 max %
D Minimum and maximum sulfur content indicates resulfurized steels.
EThe purchaser may specify the following maximum amounts: copper, 0.30 %; aluminum, 0.050 %; and oxygen, 0.0015 %.
Mechanical Property
Typical Tensile Properties, Hardness and Thermal Condition for some of the More Common Grades of Carbon and Alloy Steels
CW—Cold Worked SR—Stress Relieved A—Annealed N—NormalizedA The following are the symbol definitions for the various conditions: HR—Hot Rolle
| Grade | Condi- | Ultimate | Yield | Elongation | Rockwell, | ||||
| Desig- | tionA | Strength, | Strength, | in 2 in. or | Hardness | ||||
| nation | 50 mm, % | B Scale | |||||||
| ksi | MPa | ksi | MPa | ||||||
| 1020 | HR | 50 | 345 | 32 | 221 | 25 | 55 | ||
| CW | 70 | 483 | 60 | 414 | 5 | 75 | |||
| SR | 65 | 448 | 50 | 345 | 10 | 72 | |||
| A | 48 | 331 | 28 | 193 | 30 | 50 | |||
| N | 55 | 379 | 34 | 234 | 22 | 60 | |||
| 1025 | HR | 55 | 379 | 35 | 241 | 25 | 60 | ||
| CW | 75 | 517 | 65 | 448 | 5 | 80 | |||
| SR | 70 | 483 | 55 | 379 | 8 | 75 | |||
| A | 53 | 365 | 30 | 207 | 25 | 57 | |||
| N | 55 | 379 | 36 | 248 | 22 | 60 | |||
| 1035 | HR | 65 | 448 | 40 | 276 | 20 | 72 | ||
| CW | 85 | 586 | 75 | 517 | 5 | 88 | |||
| SR | 75 | 517 | 65 | 448 | 8 | 80 | |||
| A | 60 | 414 | 33 | 228 | 25 | 67 | |||
| N | 65 | 448 | 40 | 276 | 20 | 72 | |||
| 1045 | HR | 75 | 517 | 45 | 310 | 15 | 80 | ||
| CW | 90 | 621 | 80 | 552 | 5 | 90 | |||
| SR | 80 | 552 | 70 | 483 | 8 | 85 | |||
| A | 65 | 448 | 35 | 241 | 20 | 72 | |||
| N | 75 | 517 | 48 | 331 | 15 | 80 | |||
| 1050 | HR | 80 | 552 | 50 | 345 | 10 | 85 | ||
| SR | 82 | 565 | 70 | 483 | 6 | 86 | |||
| A | 68 | 469 | 38 | 262 | 18 | 74 | |||
| N | 78 | 538 | 50 | 345 | 12 | 82 | |||
| 1118 | HR | 50 | 345 | 35 | 241 | 25 | 55 | ||
| CW | 75 | 517 | 60 | 414 | 5 | 80 | |||
| SR | 70 | 483 | 55 | 379 | 8 | 75 | |||
| A | 50 | 345 | 30 | 207 | 25 | 55 | |||
| N | 55 | 379 | 35 | 241 | 20 | 60 | |||
| 1137 | HR | 70 | 483 | 40 | 276 | 20 | 75 | ||
| CW | 80 | 552 | 65 | 448 | 5 | 85 | |||
| SR | 75 | 517 | 60 | 414 | 8 | 80 | |||
| A | 65 | 448 | 35 | 241 | 22 | 72 | |||
| N | 70 | 483 | 43 | 296 | 15 | 75 | |||
| 4130 | HR | 90 | 621 | 70 | 483 | 20 | 89 | ||
| SR | 105 | 724 | 85 | 586 | 10 | 95 | |||
| A | 75 | 517 | 55 | 379 | 30 | 81 | |||
| N | 90 | 621 | 60 | 414 | 20 | 89 | |||
| 4140 | HR | 120 | 855 | 90 | 621 | 15 | 100 | ||
| SR | 120 | 855 | 100 | 689 | 10 | 100 | |||
| A | 80 | 552 | 60 | 414 | 25 | 85 | |||
| N | 120 | 855 | 90 | 621 | 20 | 100 | |||
d
Tolerance
Outside Diameter Tolerances for Round Hot-Finished TubingA,B,C
| Outside Diameter Size Range, | Outside Diameter Tolerance, in. (mm) | |||
| in. (mm) |
Over |
Under |
||
| Up to 2.999 (76.17) |
0.020 (0.51) |
0.020 (0.51) |
||
| 3.000–4.499 (76.20–114.27) |
0.025 (0.64) |
0.025 (0.64) |
||
| 4.500–5.999 (114.30–152.37) |
0.031 (0.79) |
0.031 (0.79) |
||
| 6.000–7.499 (152.40–190.47) |
0.037 (0.94) |
0.037 (0.94) |
||
| 7.500–8.999 (190.50–228.57) |
0.045 (1.14) |
0.045 (1.14) |
||
| 9.000–10.750 (228.60–273.05) |
0.050 (1.27) |
0.050 (1.27) |
||
A Diameter tolerances are not applicable to normalized and tempered or quenched and tempered conditions.
B The common range of sizes of hot finished tubes is 11⁄2 in. (38.1 mm) to 103⁄4 in. (273.0 mm) outside diameter with wall thickness at least 3 % or more of outside diameter, but not less than 0.095 in. (2.41 mm).
C Larger sizes are available; consult manufacturer for sizes and tolerances.
Wall Thickness Tolerances for Round Hot-Finished
Tubing
| Wall Thickness |
Wall Thickness Tolerance,A percent Over |
|||
| Range as Percent |
and Under Nominal |
|||
| of Outside | ||||
|
Outside |
Outside |
Outside |
||
| Diameter | ||||
|
Diameter |
Diameter |
Diameter |
||
|
2.999 in. |
3.000 in. |
6.000 in. |
||
|
(76.19 mm) |
(76.20 mm) |
(152.40 mm) |
||
|
and smaller |
to 5.999 in. |
to 10.750 in. |
||
|
(152.37 mm) |
(273.05 mm) |
|||
| Under 15 |
12.5 |
10.0 |
10.0 |
|
| 15 and over |
10.0 |
7.5 |
10.0 |
|
A Wall thickness tolerances may not be applicable to walls 0.199 in. (5.05 mm) and less; consult manufacturer for wall tolerances on such tube sizes.
a more important dimension, then cold-worked tubing should be specified to inside diameter and wall thickness or outside diameter and inside diameter.
Rough-Turned Mechanical Tubing—Variation in outside diameter and wall thickness shall not exceed the tolerance in Table. Table covers tolerances as applied to outside diameter and wall thickness and applies to the specified size.
Ground Mechanical Tubing—Variation in outside diam-eter shall not exceed the tolerances in Table. This product is normally produced from a cold-worked tube.
Lengths—Mechanical tubing is commonly furnished in mill lengths, 5 ft (1.5 m) and over. Definite cut lengths are furnished when specified by the purchaser. Length tolerances are shown in Table .
Straightness—The straightness tolerances for seamless round tubing shall not exceed the amounts shown in Table.
Test Requirement
1.Hardness Test
When hardness limits are required, the manufacturer shall be consulted. Typical hardnesses are listed in Table .When specified, the hardness test shall be performed on 1 % of the tubes.
2.Tension Tests
When tensile properties are required, the manufacturer shall be consulted. Typical tensile properties for some of the more common grades and thermal conditions are listed in table.
3.Nondestructive Tests
Various types of nondestructive ultrasonic or electromagnetic tests are available. The test to be used and the inspection limits shall be established by manufacturer and purchaser agreement.
4.Flaring Test
When there are special requirements for steel cleanliness, the methods of test and limits of acceptance shall be established by manufacturer and purchaser agreement.


