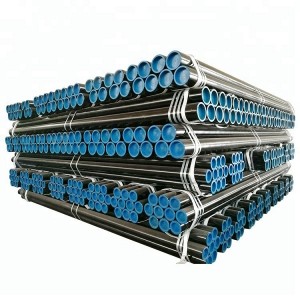
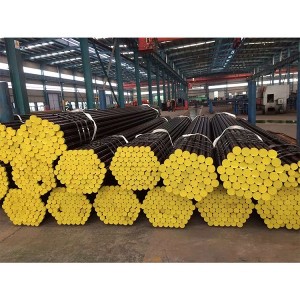
Hot Sale for China API 5L Seamless Line Steel Pipe (X42, X46, X52)
Overview
All we do is usually connected with our tenet " Client very first, Belief first", devoting about high quality and prompt delivery of our indutrial pipes, As we are moving ahead, we hold an eye on our ever-expanding products range and make improvement to our companies.
We're committed to meet all your needs and solve any technical problems you may encounter with your industrial components. Our exceptional products and solutions and vast knowledge of technology makes us the preferred choice for our customers.
According to the standard requirements, the performance requirements of pipeline steel pipes are different, and the tempering temperature can be divided into the following types:
1. Low temperature tempering (150-250 degrees)
The structure obtained by low temperature tempering is tempered martensite. Its purpose is to reduce the internal stress and brittleness of quenched steel while maintaining the high hardness and high wear resistance of the quenched steel, so as to avoid cracking or premature damage during use. It is mainly used for various high-carbon cutting tools, measuring tools, pipeline steel pipes, rolling bearings and carburized parts, etc. The hardness after tempering is generally HRC58-64.
2. Medium temperature tempering (250-500 degrees)
The structure obtained by tempering at medium temperature is tempered troostite. Its purpose is to obtain high yield strength, elastic limit and high toughness. Therefore, it is mainly used for the treatment of various pipeline steel pipes and hot work molds, and the hardness after tempering is generally HRC35-50.
3. High temperature tempering (500-650 degrees)
The structure obtained by high temperature tempering is tempered sorbite. Traditionally, the heat treatment combining quenching and high temperature tempering is called quenching and tempering treatment, the purpose of which is to obtain comprehensive mechanical properties with good strength, hardness, plasticity and toughness. Therefore, it is widely used in automobiles, pipeline steel pipes, machine tools and other important structural parts, such as connecting rods, bolts, gears and shafts. The hardness after tempering is generally HB200-330.
Application
The pipeline is used to transport the oil, steam and water drawn from the ground to the oil and gas industry enterprises through the pipeline
Main Grade
Grade for API 5L line pipe steel: Gr.B X42 X52 X60 X65 X70
Chemical Component
| Steel Grade (Steel Name) | Mass Fraction, Based on Heat and Product Analyses a,g% | |||||||
| C | Mn | P | S | V | Nb | Ti | ||
| max b | max b | min | max | max | max | max | max | |
| Seamless Pipe | ||||||||
| L175 or A25 | 0.21 | 0.60 | — | 0.030 | 0.030 | — | — | — |
| L175P or A25P | 0.21 | 0.60 | 0.045 | 0.080 | 0.030 | — | — | — |
| L210 or A | 0.22 | 0.90 | — | 0.030 | 0.030 | — | — | — |
| L245 or B | 0.28 | 1.20 | — | 0.030 | 0.030 | c,d | c,d | d |
| L290 or X42 | 0.28 | 1.30 | — | 0.030 | 0.030 | d | d | d |
| L320 or X46 | 0.28 | 1.40 | — | 0.030 | 0.030 | d | d | d |
| L360 or X52 | 0.28 | 1.40 | — | 0.030 | 0.030 | d | d | d |
| L390 or X56 | 0.28 | 1.40 | — | 0.030 | 0.030 | d | d | d |
| L415 or X60 | 0.28 e | 1.40 e | — | 0.030 | 0.030 | f | f | f |
| L450 or X65 | 0.28 e | 1.40 e | — | 0.030 | 0.030 | f | f | f |
| L485 or X70 | 0.28 e | 1.40 e | — | 0.030 | 0.030 | f | f | f |
| Welded Pipe | ||||||||
| L175 or A25 | 0.21 | 0.60 | — | 0.030 | 0.030 | — | — | — |
| L175P or A25P | 0.21 | 0.60 | 0.045 | 0.080 | 0.030 | — | — | — |
| L210 or A | 0.22 | 0.90 | — | 0.030 | 0.030 | — | — | — |
| L245 or B | 0.26 | 1.20 | — | 0.030 | 0.030 | c,d | c,d | d |
| L290 or X42 | 0.26 | 1.30 | — | 0.030 | 0.030 | d | d | d |
| L320 or X46 | 0.26 | 1.40 | — | 0.030 | 0.030 | d | d | d |
| L360 or X52 | 0.26 | 1.40 | — | 0.030 | 0.030 | d | d | d |
| L390 or X56 | 0.26 | 1.40 | — | 0.030 | 0.030 | d | d | d |
| L415 or X60 | 0.26 e | 1.40 e | — | 0.030 | 0.030 | f | f | f |
| L450 or X65 | 0.26 e | 1.45 e | — | 0.030 | 0.030 | f | f | f |
| L485 or X70 | 0.26 e | 1.65 e | — | 0.030 | 0.030 | f | f | f |
|
a Cu ≤ 0.50 %; Ni ≤ 0.50 %; Cr ≤ 0.50 % and Mo ≤ 0.15 %. b For each reduction of 0.01 % below the specified maximum concentration for carbon, an increase of 0.05 % above the specified maximum concentration for Mn is permissible, up to a maximum of 1.65 % for grades ≥ L245 or B, but ≤ L360 or X52; up to a maximum of 1.75 % for grades > L360 or X52, but < L485 or X70; and up to a maximum of 2.00 % for Grade L485 or X70. c Unless otherwise agreed, Nb + V ≤ 0.06 %. d Nb + V + Ti ≤ 0.15 %. e Unless otherwise agreed. f Unless otherwise agreed, Nb + V + Ti ≤ 0.15 %. g No deliberate addition of B is permitted and the residual B ≤ 0.001 %. |
||||||||
Mechanical Property
|
Pipe Grade |
Pipe Body of Seamless and Welded Pipe | Weld Seam of EW, LW, SAW, and COWPipe | ||
| Yield Strength a Rt0.5 | Tensile Strength a Rm | Elongation(on 50 mm or 2 in.)Af | Tensile Strength b Rm | |
| MPa (psi) | MPa (psi) | % | MPa (psi) | |
| min | min | min | min | |
| L175 or A25 | 175 (25,400) | 310 (45,000) | c | 310 (45,000) |
| L175P or A25P | 175 (25,400) | 310 (45,000) | c | 310 (45,000) |
| L210 or A | 210 (30,500) | 335 (48,600) | c | 335 (48,600) |
| L245 or B | 245 (35,500) | 415 (60,200) | c | 415 (60,200) |
| L290 or X42 | 290 (42,100) | 415 (60,200) | c | 415 (60,200) |
| L320 or X46 | 320 (46,400) | 435 (63,100) | c | 435 (63,100) |
| L360 or X52 | 360 (52,200) | 460 (66,700) | c | 460 (66,700) |
| L390 or X56 | 390 (56,600) | 490 (71,100) | c | 490 (71,100) |
| L415 or X60 | 415 (60,200) | 520 (75,400) | c | 520 (75,400) |
| L450 or X65 | 450 (65,300) | 535 (77,600) | c | 535 (77,600) |
| L485 or X70 | 485 (70,300) | 570 (82,700) | c | 570 (82,700) |
| a For intermediate grades, the difference between the specified minimum tensile strength and the specified minimum yield strength for the pipe body shall be as given in the table for the next higher grade.b For intermediate grades, the specified minimum tensile strength for the weld seam shall be the same value as was determined for the pipe body using footnote a).c The specified minimum elongation, Af, expressed in percent and rounded to the nearest percent, shall be as determined using the following equation:
where C is 1940 for calculations using SI units and 625,000 for calculations using USC units; Axc is the applicable tensile test piece cross-sectional area, expressed in square millimeters (square inches), as follows: 1) for circular cross-section test pieces, 130 mm2 (0.20 in.2) for 12.7 mm (0.500 in.) and 8.9 mm (0.350 in.) diameter test pieces; 65 mm2 (0.10 in.2) for 6.4 mm (0.250 in.) diameter test pieces; 2) for full-section test pieces, the lesser of a) 485 mm2 (0.75 in.2) and b) the cross-sectional area of the test piece, derived using the specified outside diameter and the specified wall thickness of the pipe, rounded to the nearest 10 mm2 (0.01 in.2); 3) for strip test pieces, the lesser of a) 485 mm2 (0.75 in.2) and b) the cross-sectional area of the test piece, derived using the specified width of the test piece and the specified wall thickness of the pipe, rounded to the nearest 10 mm2 (0.01 in.2); U is the specified minimum tensile strength, expressed in megapascals (pounds per square inch). |
||||
Outside diameter, out of roundness and wall thickness
| Specified Outside Diameter D (in) | Diameter Tolerance, inches d | Out-of-Roundness Tolerance in | ||||
| Pipe except the end a | Pipe end a,b,c | Pipe except the End a | Pipe End a,b,c | |||
| SMLS Pipe | Welded Pipe | SMLS Pipe | Welded Pipe | |||
| < 2.375 | -0.031 to + 0.016 | – 0.031 to + 0.016 | 0.048 | 0.036 | ||
| ≥2.375 to 6.625 | 0.020D for | 0.015D for | ||||
| +/- 0.0075D | – 0.016 to + 0.063 | D/t≤75 | D/t≤75 | |||
| By agreement for | By agreement for | |||||
| >6.625 to 24.000 | +/- 0.0075D | +/- 0.0075D, but max of 0.125 | +/- 0.005D, but max of 0.063 | 0.020D | 0.015D | |
| >24 to 56 | +/- 0.01D | +/- 0.005D but max of 0.160 | +/- 0.079 | +/- 0.063 | 0.015D for but max of 0.060 | 0.01D for but max of 0.500 |
| For | For | |||||
| D/t≤75 | D/t≤75 | |||||
| By agreement | By agreement | |||||
| for | for | |||||
| D/t≤75 | D/t≤75 | |||||
| >56 | As agreed | |||||
| a. The pipe end includes a length of 4 in ate each of the pipe extremities | ||||||
| b. For SMLS pipe the tolerance apply for t≤0.984in and the tolerances for the thicker pipe shall be as agreed | ||||||
| c. For expanded pipe with D≥8.625in and for non-expanded pipe, the diameter tolerance and the out-of-roundness tolerance may be determined using the calculated inside diameter or measured inside diameter rather than the specified OD. | ||||||
| d. For determining compliance to diameter tolerance, the pipe diameter is defined as the circumference of the pipe in any circumferential plane divide by Pi. | ||||||
| Wall thickness | Tolerances a |
| t inches | inches |
| SMLS pipe b | |
| ≤ 0.157 | -1.2 |
| > 0.157 to < 0.948 | + 0.150t / – 0.125t |
| ≥ 0.984 | + 0.146 or + 0.1t, whichever is the greater |
| – 0.120 or – 0.1t, whichever is the greater | |
| Welded pipe c,d | |
| ≤ 0.197 | +/- 0.020 |
| > 0.197 to < 0.591 | +/- 0.1t |
| ≥ 0.591 | +/- 0.060 |
| a. If the purchase order specifies a minus tolerance for wall thickness smaller than the applicable value given in this table, the plus tolerance for wall thickness shall be increased by an amount sufficient to maintain the applicable tolerance range. | |
| b. For pipe with D≥ 14.000 in and t≥0.984in, the wall thickness tolerance locally may exceed the plus tolerance for wall thickness by an additional 0.05t provided that the plus tolerance for mass is not exceeded. | |
| c. The plus tolerance for wall thickens does not apply to the weld area | |
| d. See the full API5L spec for full details | |
Tolerance
Test Requirement
Hydrostatic test
Pipe to withstand a hydrostatic test without leakage through the weld seam or the pipe body. Jointers need not be hydrostatic tested provide the pipe sections used were successfully tested.
Bend test
No cracks shall occur in any portion of the test piece and no opening of the weld shall occur.
Flattening test
Acceptance criteria for flattening test shall be:
- EW pipes D<12.750 in:
- X60 with T 500in. There shall be no opening of the weld before the distance between the plates is less than 66% of the original outside diameter. For all grades and wall, 50%.
- For pipe with a D/t > 10, there shall be no opening of the weld before the distance between the plates is less than 30% of the original outside diameter.
- For other sizes refer to the full API 5L specification.
CVN impact test for PSL2
Many PSL2 pipe sizes and grades require CVN. Seamless pipe is to be tested in the body. Welded pipe is to be tested in the body, pipe weld and heat-affected zone. Refer to the full API 5L specification for the chart of sizes and grades and required absorbed energy values.


